I'm currently in the midst of creating a game-style environment featuring the story of an investigator staking out a location to find his suspect.
My previous environment, an art test for a game company, was created in the Unreal Engine. But this time around I wanted to utilize Unity. And although Unity is a very competitive alternative to the Unreal Engine, it does come with a set of its own unique challenges. In this article, I'll mostly be discussing Unity's lack of out-of-box shader editor, and some of my techniques using capable third-party tools.
The Unreal Engine has been well known to have an incredibly capable and modern shader editor, even far before version 4. For a long time, Unity's major drawback has been not having a competitive system for the same need - however the community behind Unity rose to the challenge of creating worthy substitutes.
The most commonly known third-party shader editor for Unity is Shader Forge. And while Shader Forge is undoubtedly the most proven plug-in available, I decided to instead go with an up and coming shader editor: Amplify Shader Editor (ASE)
Although deciding to go with ASE was a risk, being that it is newer, it was considerably cheaper than Shader Forge at the time. And although when I purchased ASE 10 months ago, I did find its limitations once I drifted too far into more advanced shader setups, I did find it to be a very capable shader editor. And since then, the Amplify team has updated ASE with some incredible features (while also upping its price tag since my purchase, deservedly so). At this point, I would categorize ASE being just about as capable as Shader Forge.
My goal was to create a set of shaders that I could reuse over multiple projects. Unity's out-of-the-box shader setup is acceptable for someone who doesn't focus on art, or for individuals and simple projects rather than teams of people with a need for adaptable toolsets. Creating your own custom shaders is an absolute need for any production pipeline, as well as any artist who wants to be able to create the best looking artwork quickly and simply.
A Proper Foundation
=
Ease of Production
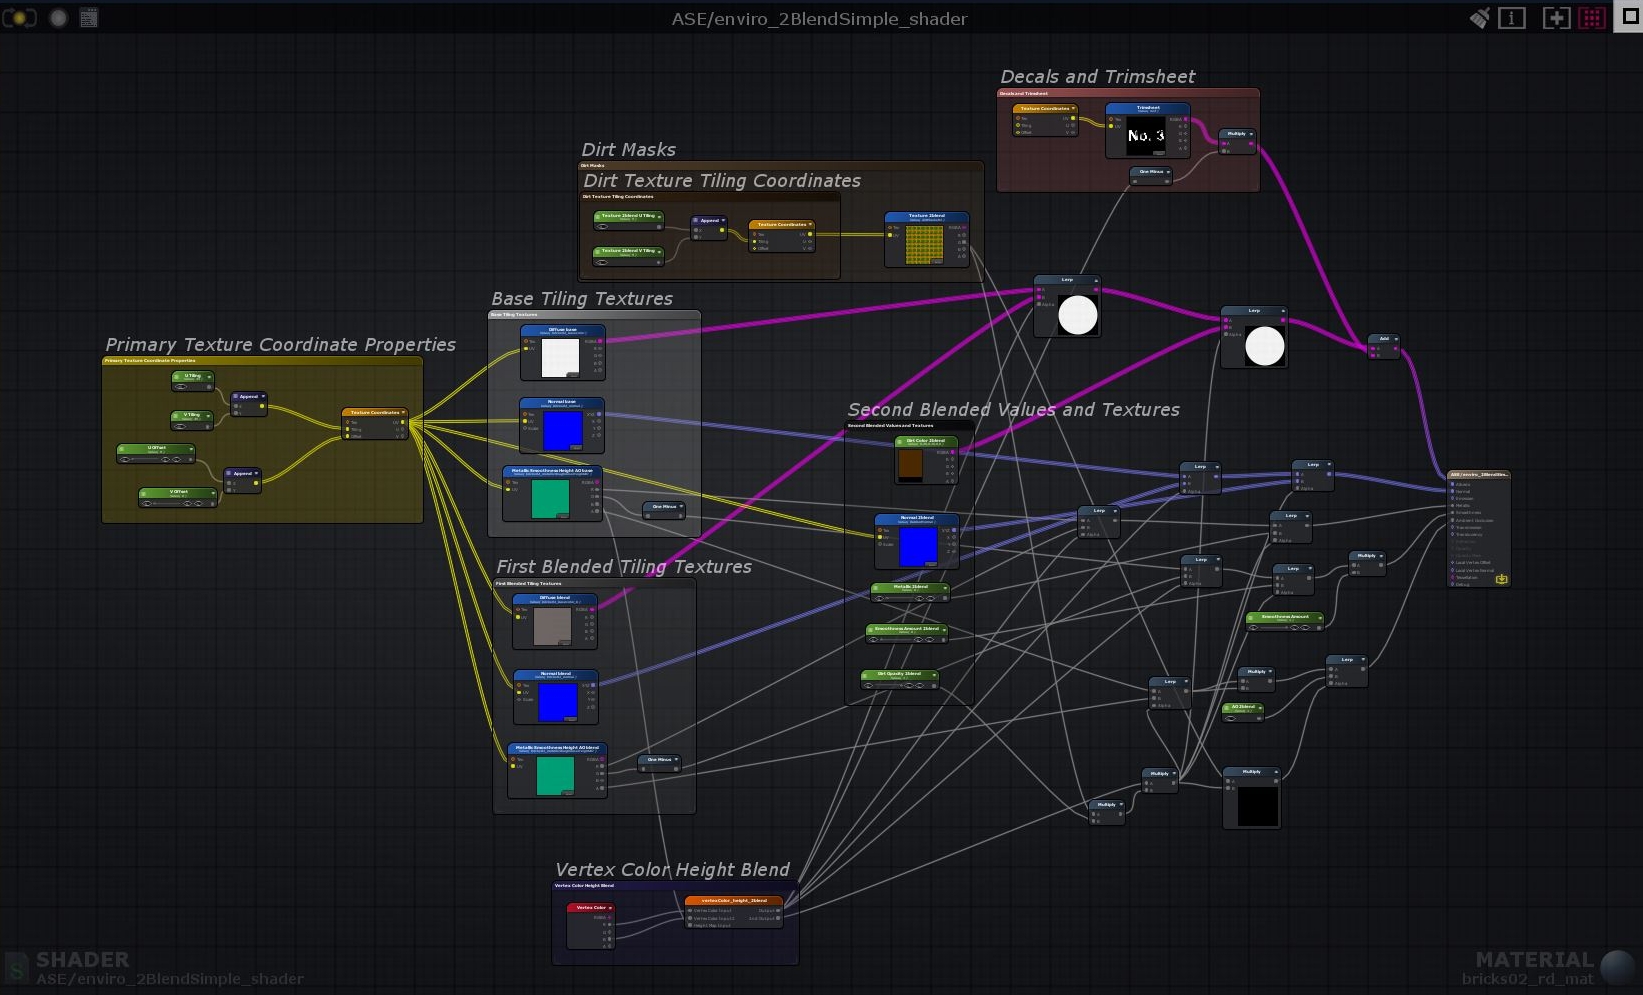
The image above is one of my environment shaders; 'Enviro_2BlendSimple_shader', the formatting means 2 blended textures and 1 simple blended value. This shader has the most extensive exposed parameters and controls that I've created for this project. I have other simpler shaders with only 2 texture blends or one simple blend, but for the article I wanted to focus on what ASE could do on the more intermediate-advanced level.
The shader is setup to blend 3 different texture types* onto one object, controlled by vertex color masking. In my current work in progress environment, the walls are using this shader. It's blending 2 of texture types, and 1 simpler value for general dirt/dust. The strength of the blend is being controlled by the height map from the base texture type. The two texture types in my example are of two different types of bricks, painted bricks and raw brick materials. The 'simpler' value on top of all that is just a Color node blended on the albedo, a simple flat Normal map texture to smoothen the surface, and simple value parameters for the metallic/roughness, which are all be blended using the Height map texture.
*Note: A texture type is a group of textures which, altogether, represent one material type. For instance in my scene, Painted Brick is one texture type, where as Raw Brick is another texture type.
Traditionally, one might blend all these textures by using an overall hand-painted greyscale texture mask. Although that is sometimes the best solution for masked texture blending, it isn't the only way and it certainly isn't the best technique for every instance. In the case of environment textures that are tiled over a large space, using a traditional texture mask that's limited by pixel resolution can have obvious visual quality issues. On top of that, in Shader Model 4.0-5.0, you're limited to 32 texture samples. And while 32 textures may seem like a lot, this number can drop quickly when building a complex material, and performance will also drop significantly with the number of textures you use.
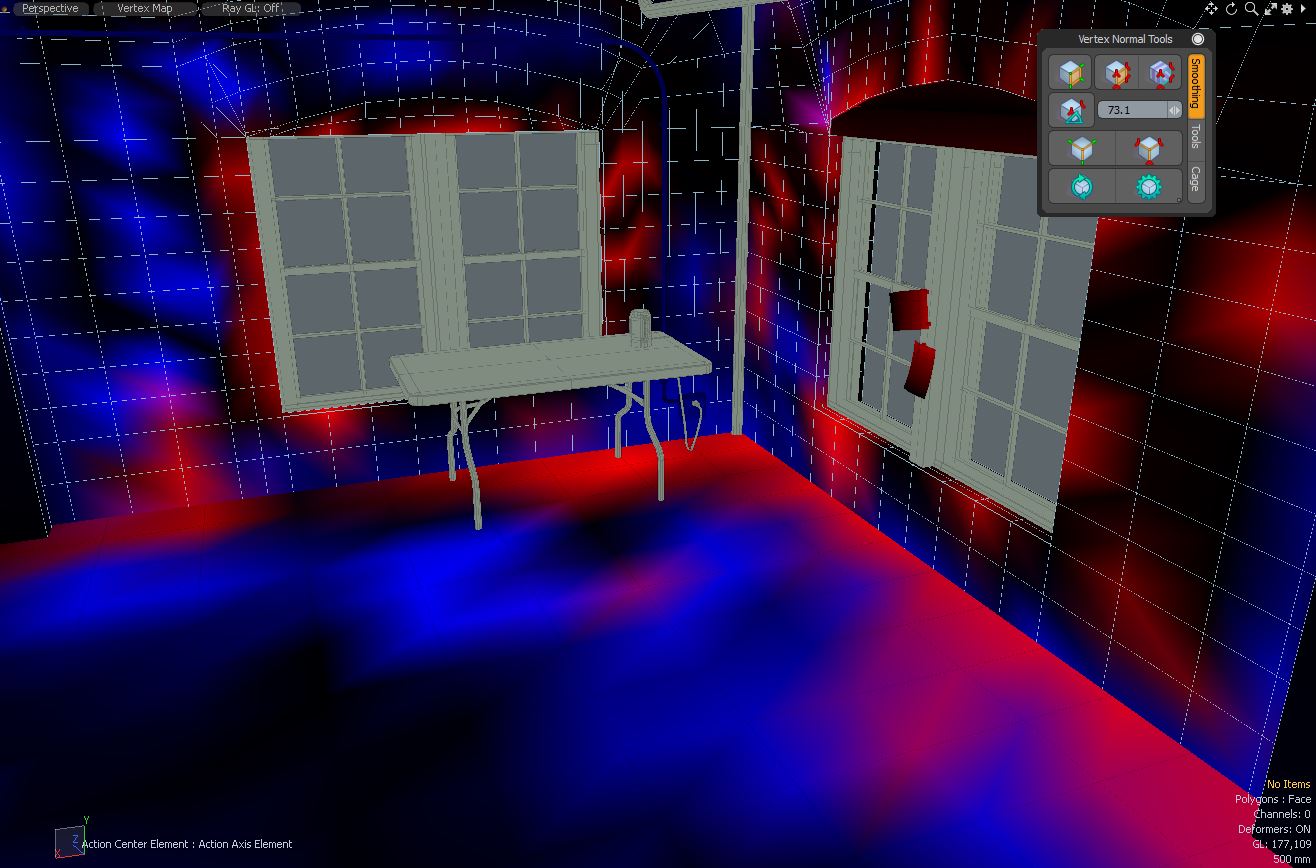
Instead, one can utilize vertex colors embedded in models for masking. Red can represent a its own mask, as can blue, as can green, and even the alpha vertex channel can be used. That's 4 hand-painted masks essentially for free. As you can see from the image on the left, the colors are quite simple and blend into each other in a very mathematically interpolated way - that's where the height map comes in handy.
One can use a heightmap multiplied on top of the vertex color masks to get a more realistic blend between the texture types.
For my projects, I set a standard for RGBA texture packing wherever possible. One texture map contains the following maps: Metallic, Roughness, Height, and Ambient Occlusion. Meanwhile my Albedo and Normal maps are their own texture samples, and I utilize their alpha channels whenever needed. This reduces performances issues while consequently making it easier to keep the node graph cleaner. As mentioned previously, this saves the player from a poor performing game, and for the artist it keeps file sizes small and the graph node clean and simple. All at no cost to visuals.
I think the most important part of this entire process is reuse. If I need to make another material for a different environment, say I was re-making Mos Eisley on Tattooine; I could use this same shader for the adobe-like huts, just drop in new textures for the base and blend parameters and tweak the settings I've exposed for the needs of the material.
And if I need to create a new shader with the same vertex color blend setup, I'm also utilizing Shader Functions to pack up graph networks that would otherwise be a chore to have to recreate over and over.
In conclusion, when you first start to setup a pipeline like this, it can seem tedious and difficult; often breaking things and re-fixing them, then learning through trial and error. However, all the time spent setting up this foundation pays off in a big way when you have complex materials that take only seconds to setup for a new material type in your environment.


![sf_logo[1].png](https://images.squarespace-cdn.com/content/v1/50e39f08e4b0c2f49770aa25/1510901329936-EAXC3Z4YSGF1RVWKJDBW/sf_logo%5B1%5D.png)
![icon_precise_v1_90[1].png](https://images.squarespace-cdn.com/content/v1/50e39f08e4b0c2f49770aa25/1510901446889-RII0JAT3U6PG0TF5JBYA/icon_precise_v1_90%5B1%5D.png)


